

Rain has a way of turning a calm outdoor moment into a test of patience and survival. I have found myself more than once caught under darkening skies with little time to prepare, and those moments taught me that speed matters just as much as technique. A reliable shelter is not about perfection but about making quick, smart decisions with what is available. In less than 30 minutes, it is entirely possible to set up a structure that keeps you dry, warm, and protected from wind, as long as you follow a clear and practical process.
Start With The Right Location
The ground you choose can make or break your shelter, no matter how well you build it. I always look for slightly elevated terrain because water naturally flows downhill, and the last thing anyone needs is waking up in a puddle. Flat surfaces are ideal, but I avoid depressions, riverbanks, or areas with visible runoff paths.
Tree cover is another major factor that cannot be ignored. A dense canopy helps reduce the amount of rain hitting your shelter directly, giving you an extra layer of protection. I also check for hazards above, such as dead branches or unstable trees, because safety should never be compromised for convenience.
Wind direction plays a role that many people overlook. Facing your shelter away from strong winds reduces the chance of rain being blown inside. Even a well-built shelter can fail if wind pushes water through openings, so positioning is just as critical as construction.
Gather Materials Quickly And Efficiently
Time is limited, so I focus on collecting only what is necessary instead of overcomplicating things. A tarp is the most valuable item if I have one, but natural materials like large leaves, branches, and vines can work just as well in a pinch. The goal is to create a waterproof barrier, not a masterpiece.
I prioritize sturdy branches for the frame because they form the backbone of the structure. Flexible materials like vines or strips of bark help tie everything together, especially if rope is not available. Even small details like having enough leaves to layer properly can make a huge difference in keeping rain out.
Efficiency matters more than perfection during this stage. I gather everything within a short radius to save time and energy, avoiding long trips that eat into the 30-minute window. Once the materials are ready, the actual building process becomes much smoother and faster.
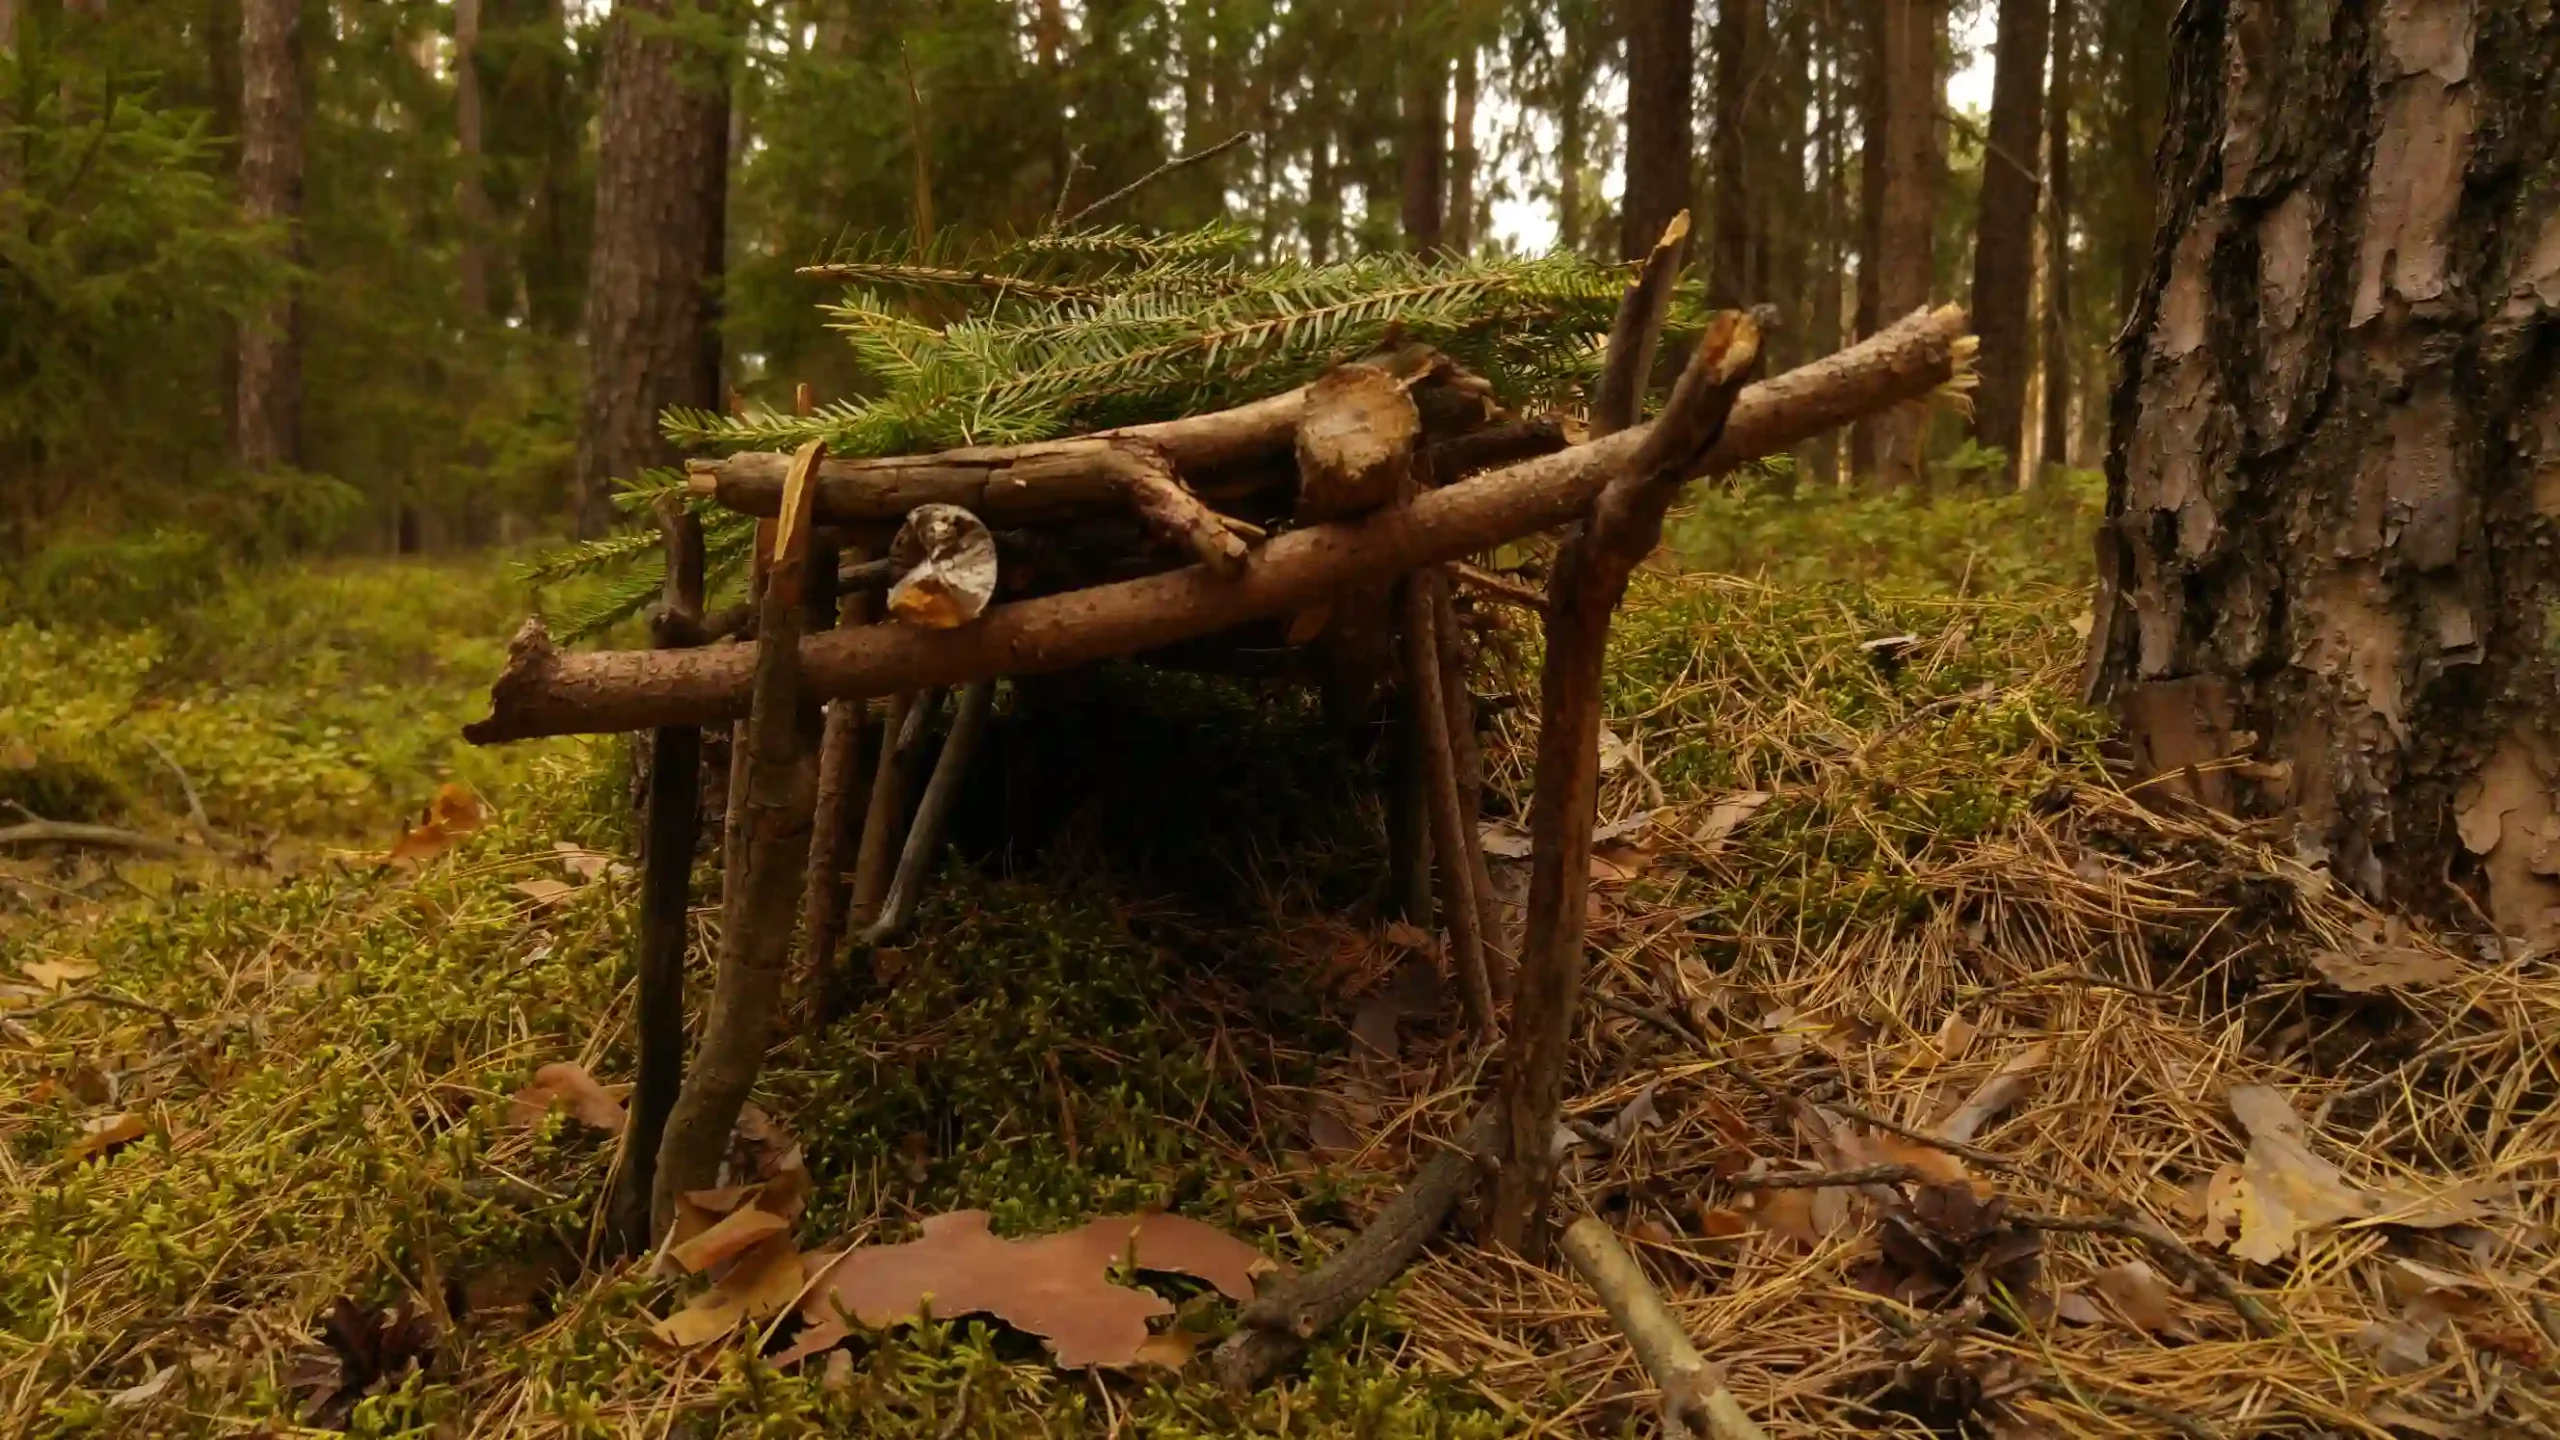
Build A Simple Frame First
The frame is the skeleton of the shelter, and I always keep the design simple to save time. A basic lean-to structure works best because it requires fewer materials and can be assembled quickly. By placing one long branch at an angle against a stable support like a tree or rock, I create the main ridge line.
Supporting branches are then placed along the sides to form the shape of the shelter. These do not need to be perfectly aligned, but they should be strong enough to hold the covering materials without collapsing. Stability is more important than symmetry in this situation.
I make sure the angle of the frame allows rainwater to run off easily. A steep slope prevents water from pooling on top, which could cause the shelter to sag or fail. This step sets the foundation for everything else, so taking a few extra minutes to get it right is worth it.
Add A Waterproof Layer
Once the frame is secure, I move on to covering it with waterproof materials. If I have a tarp, I stretch it tightly over the frame and secure it at multiple points to prevent flapping. Loose coverings can let water in, especially during heavy rain or strong winds.
Natural materials require a layering technique to be effective. Large leaves or pieces of bark are placed from the bottom up, overlapping like shingles on a roof. This method ensures that water flows downward without seeping through gaps.
Thickness plays a crucial role in keeping the shelter dry. I add multiple layers to increase insulation and protection, even if it takes a few extra minutes. A thin covering might save time initially but often fails under steady rainfall, which defeats the purpose entirely.
Secure Everything Firmly
A shelter is only as good as how well it is anchored. I take time to tie or weigh down the materials to prevent them from shifting in the wind. Even a slight movement can create openings that allow rain to enter.
Rocks, logs, or stakes can be used to hold the base of the covering in place. I make sure all edges are secured, especially the side facing the wind. This extra step reduces the chances of the shelter coming apart during a storm.
Attention to detail makes a noticeable difference here. Small adjustments, like tightening a loose corner or reinforcing a weak spot, can significantly improve the shelter’s durability. These quick fixes often take just a minute but add a lot of reliability.
Create A Dry Ground Layer
Staying dry is not just about what is above you but also what is beneath you. Wet ground can quickly drain body heat and make the experience uncomfortable. I always add a layer of insulation between myself and the ground.
Leaves, grass, or small branches work well for this purpose. I pile them thick enough to create a cushion that keeps moisture away. This also adds a bit of comfort, which can make a big difference during long periods of rain.
If time allows, I clear the area first to remove sharp objects or debris. This prevents discomfort and potential injuries while resting. A dry, insulated base completes the shelter and makes it far more effective.
Improve Drainage Around The Shelter
Water management goes beyond just the structure itself. I often dig a small trench around the shelter to direct rainwater away. This simple step can prevent water from pooling underneath and seeping inside.
The trench does not need to be deep or wide to be effective. Even a shallow channel can guide water away from the sleeping area. I make sure it slopes slightly so that water flows naturally.
This step is especially useful during heavy rain. It adds an extra layer of protection and ensures that the shelter remains dry even in challenging conditions. Spending a few minutes on drainage can save a lot of discomfort later.
Keep The Entrance Minimal And Protected
An open entrance can let rain and wind inside if not handled properly. I keep the opening small and position it away from the direction of the wind. This reduces exposure and helps maintain a dry interior.
If materials are available, I create a simple flap or cover for the entrance. A piece of tarp or layered leaves can act as a door, blocking rain while still allowing access. This small addition improves the overall effectiveness of the shelter.
Ventilation is still important, so I avoid sealing the shelter completely. A balance between airflow and protection keeps the space comfortable without letting water in. Managing the entrance properly makes a noticeable difference in staying dry.
Work With Time In Mind
Speed is essential, but rushing without a plan can lead to mistakes. I focus on completing the most important steps first, such as the frame and waterproof layer. These are the core elements that provide immediate protection.
Secondary improvements like drainage and insulation can be added quickly afterward. Breaking the process into simple steps helps maintain efficiency without feeling overwhelmed. Each task builds on the previous one, creating a functional shelter in a short time.
Experience has shown that staying calm and organized is just as important as technical skill. Even under pressure, a clear approach allows everything to come together smoothly. The goal is not perfection but effectiveness within the time limit.
Adapt To What You Have Available
Conditions are rarely ideal, and flexibility is key to success. I adjust the design based on the materials and environment around me. A tarp might lead to one approach, while natural materials might require another.
Creativity plays a big role in these situations. A fallen tree can serve as part of the frame, or a rock formation can provide natural support. Using what is already available saves time and effort.
No two shelters are exactly the same, and that is part of the process. Adapting quickly ensures that the shelter meets the immediate need, even if conditions change. This mindset makes building under pressure much more manageable.
Final Thoughts On Staying Dry And Safe
A rainproof shelter built in under 30 minutes is not just possible but practical with the right approach. The key lies in focusing on essentials, working efficiently, and making smart decisions along the way. Each step contributes to creating a space that offers protection and comfort in challenging conditions.
Experience has taught me that preparation and mindset matter just as much as technique. Staying calm, thinking clearly, and using available resources effectively can turn a stressful situation into a manageable one. The more these skills are practiced, the faster and more reliable the process becomes.
Rain does not have to ruin an outdoor experience. With a bit of knowledge and quick action, it is entirely possible to stay dry and safe even when the weather turns unexpectedly.