
A sharp knife, a quiet forest, and a piece of green wood can turn into a full toolkit if handled with patience and intent. I’ve spent hours shaping branches into tools that made life outdoors easier, safer, and more efficient. The process is both practical and deeply satisfying, especially when a simple stick becomes something you rely on. Wood carving in the wild isn’t about perfection or artistry alone; it’s about function, survival, and making the most of what is available around you.
Selecting The Right Wood For Carving
The success of any carved tool begins with the wood itself. I always look for green wood, which is freshly cut or still alive, because it is softer and easier to shape compared to dry, brittle branches. Dead wood may seem convenient, but it tends to crack unpredictably and can ruin hours of effort in seconds. Hardwood species like oak or maple provide durability, while softer woods like willow or pine are easier to carve for beginners or quick tools.
I pay attention to the grain and straightness of the branch before cutting. A straight piece with minimal knots allows for smoother carving and stronger finished tools. Knots can weaken the structure and cause uneven cuts, which becomes frustrating when precision matters. Taking a few extra minutes to find the right piece of wood saves much more time during carving.
Moisture content also plays a big role in how the wood behaves. Freshly cut wood feels slightly damp and has a bit of weight to it, which is ideal for carving. As the wood dries, it becomes harder and more prone to splitting, so I try to shape it as soon as possible after cutting. Timing can make the difference between an easy project and a difficult one.

Essential Knife Techniques For Safe Carving
A reliable knife is the most important tool in this process, but technique matters more than the blade itself. I always keep my cuts controlled and deliberate, never forcing the knife through the wood. Slow, steady movements give me more accuracy and reduce the risk of slipping. Rushing only leads to mistakes or injuries, which can be serious in a wilderness setting.
One of the first techniques I rely on is the push cut, where the knife moves away from my body while my thumb guides the blade. This gives me control and helps shape wood gradually without taking off too much at once. For finer work, I use a pull cut, drawing the blade toward me carefully while keeping my hands positioned safely. Each technique has its place depending on the shape I am trying to achieve.
Grip and body positioning are just as important as the cuts themselves. I make sure my hands are stable and my carving angle is comfortable, especially during longer sessions. Fatigue can lead to sloppy movements, so I take breaks when needed. Staying aware of where the blade is at all times becomes second nature with practice.
Crafting A Wooden Spoon For Daily Use
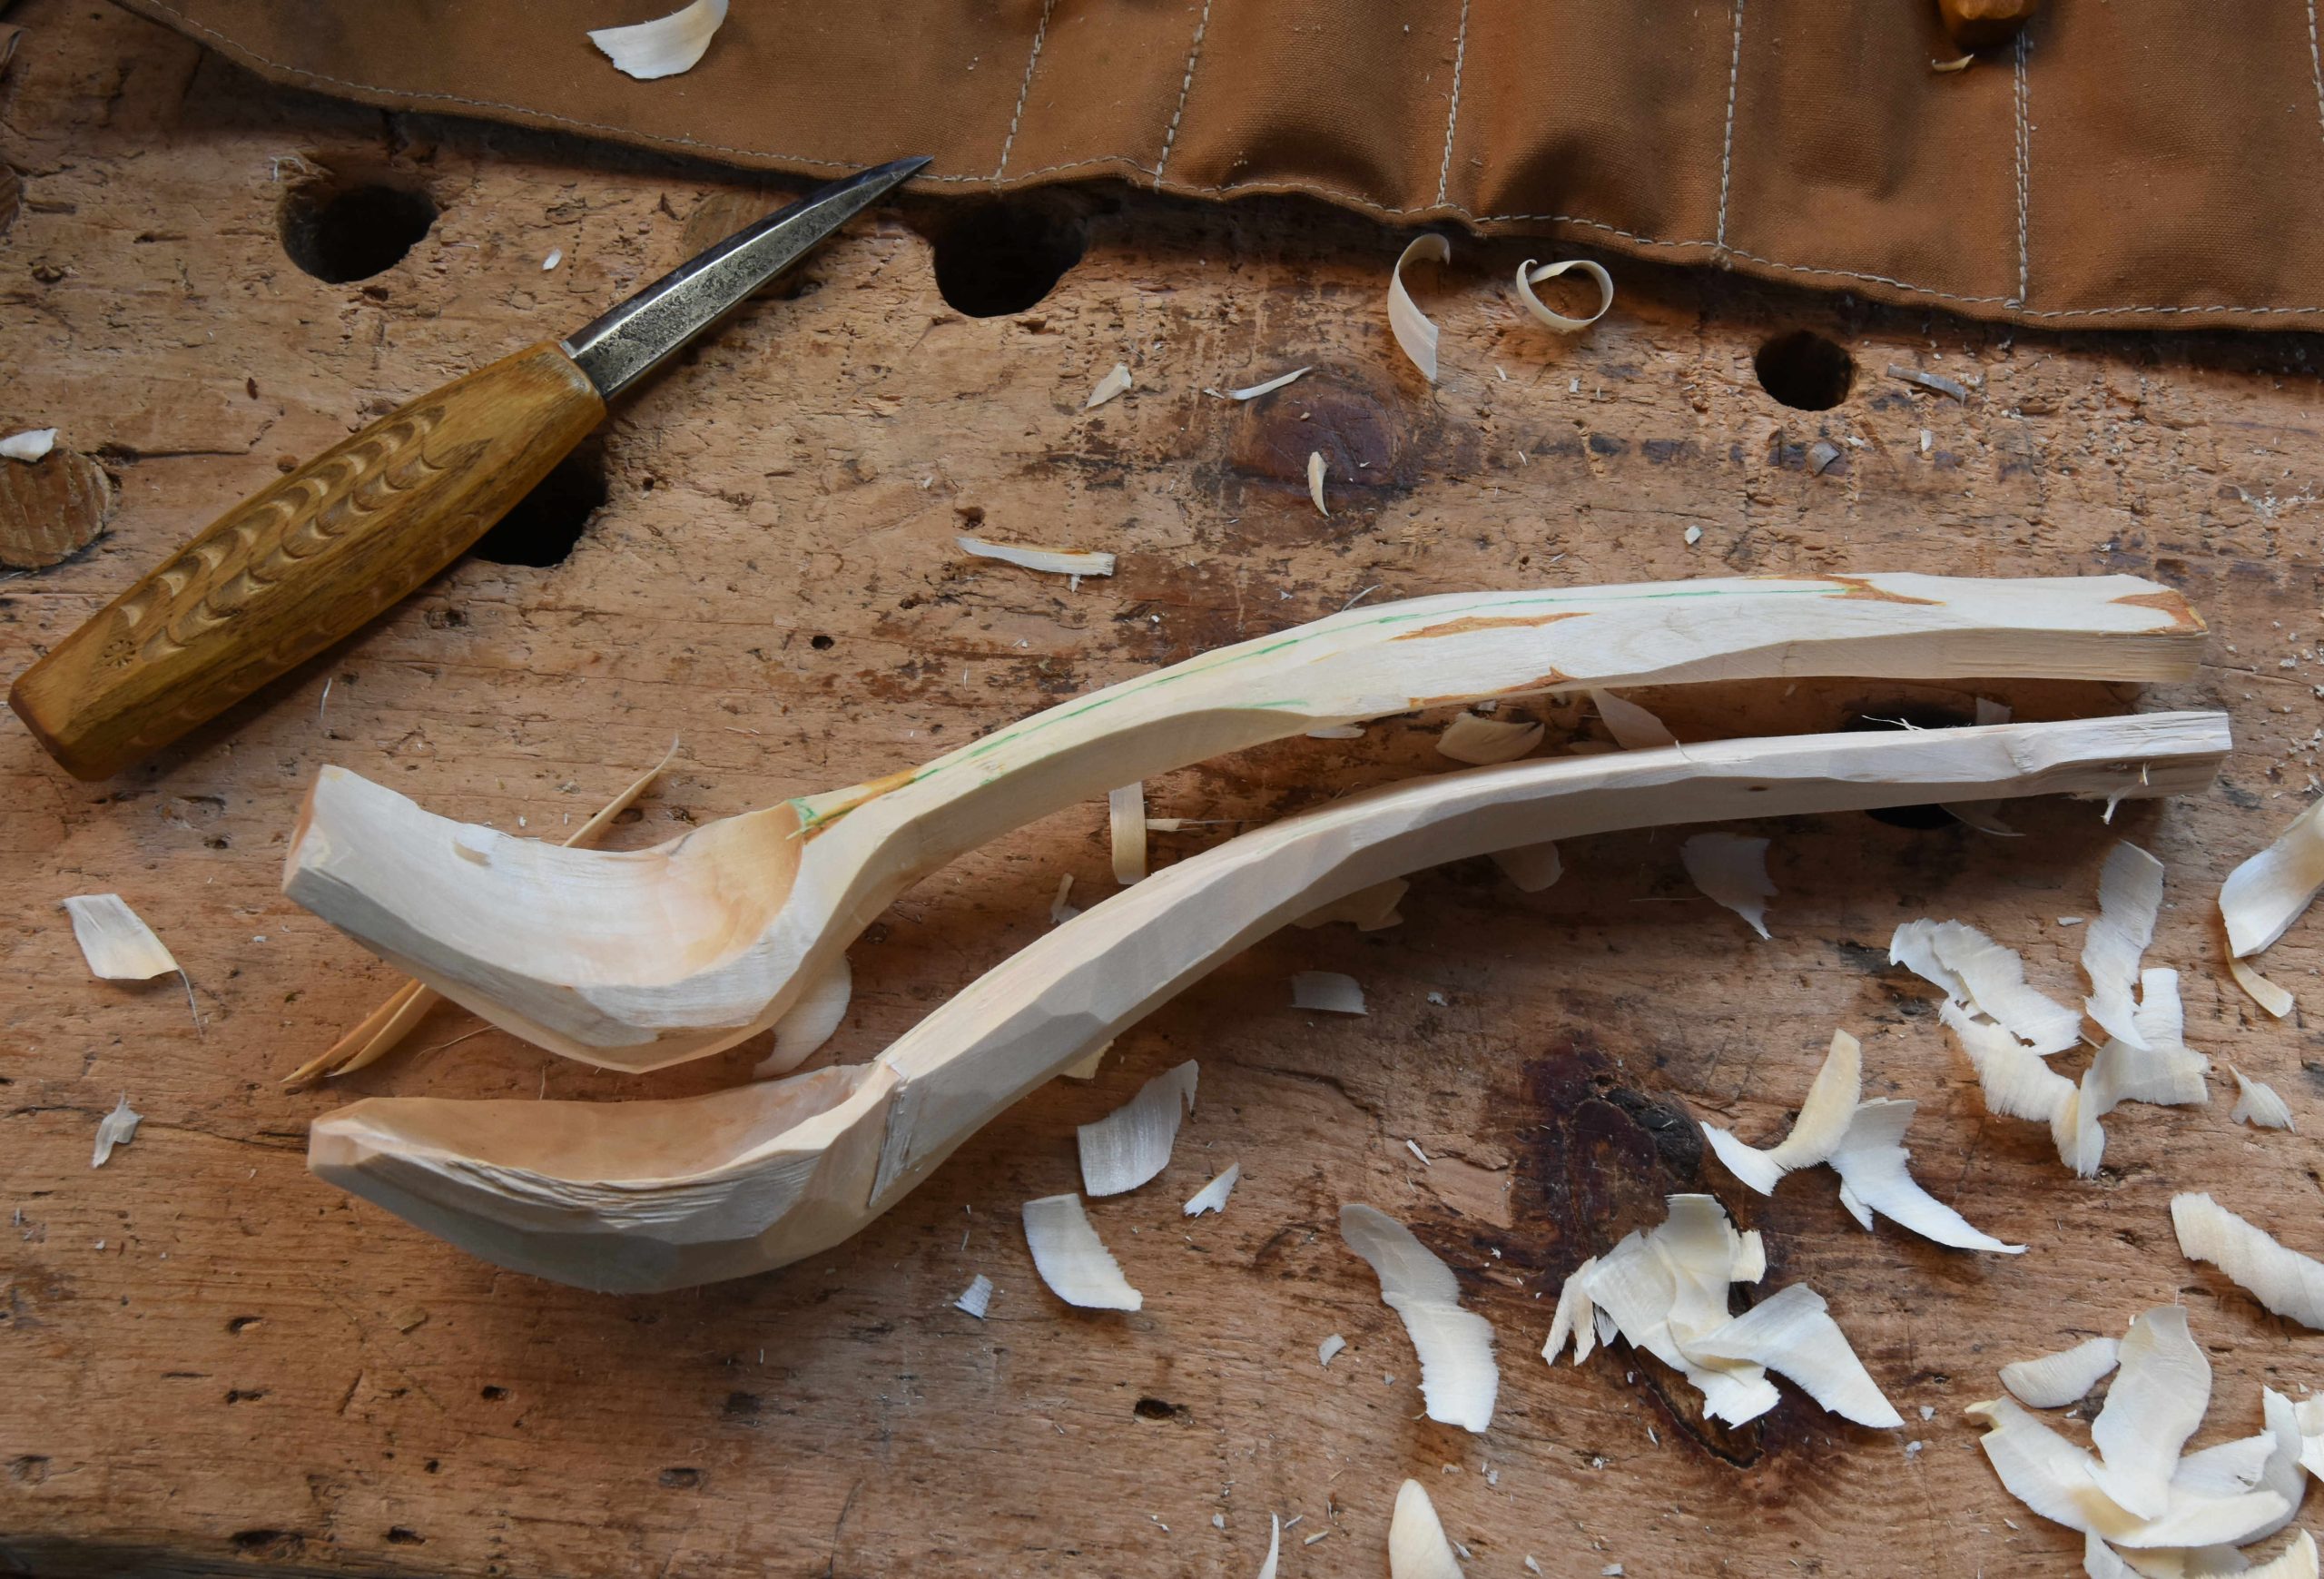
A wooden spoon is one of the most useful tools I’ve carved in the wild. It serves for cooking, eating, and even measuring ingredients when supplies are limited. Starting with a thick branch, I outline the shape of the spoon using shallow cuts to define the handle and bowl. This initial step helps guide the rest of the carving process.
Shaping the handle comes first because it sets the overall balance of the spoon. I gradually remove wood until the handle feels comfortable in my hand, making sure it is neither too thick nor too fragile. The goal is to create something that can withstand repeated use without breaking. Smooth transitions between the handle and bowl add strength and improve the feel.
Carving the bowl requires patience and careful control. I slowly hollow out the center using small cuts, working evenly to avoid thinning one side too much. The final result doesn’t need to be perfect, but it should hold food securely and feel natural when used. After finishing, I often let the spoon dry slowly to prevent cracking.
Making A Strong Tent Peg From Scratch
A sturdy tent peg can make a significant difference when setting up shelter in rough conditions. I start with a straight, solid piece of hardwood that can handle pressure from the ground and tension from ropes. The length depends on the terrain, but I usually aim for something long enough to anchor securely.
The first step is sharpening one end into a point that can penetrate the soil. I carve evenly around the tip to keep it centered and strong, avoiding overly thin edges that might snap. A well-shaped point slides into the ground more easily and holds better under tension. This simple detail improves the effectiveness of the peg.
Adding a notch near the top allows the rope to stay in place without slipping. I carve a shallow groove that is deep enough to secure the line but not so deep that it weakens the structure. The finished peg should feel solid and balanced, ready to handle wind and shifting ground. It’s a small tool, but it plays a critical role in maintaining shelter.
Carving A Simple Wooden Mallet
A wooden mallet becomes invaluable when driving stakes or working with other tools. I prefer using a thicker branch with a natural curve or a section where the head and handle can be formed from one piece. This reduces the risk of breakage and creates a more durable tool overall.
I begin by defining the head of the mallet, leaving it bulkier for impact strength. The handle is then shaped to fit comfortably in my grip, ensuring control during use. Balance is important here, as a poorly shaped mallet can feel awkward and inefficient. A well-balanced tool reduces strain and improves accuracy.
The striking surface needs to be flat and sturdy. I smooth it out with controlled cuts, removing any uneven edges that could cause splitting upon impact. Over time, the mallet may show wear, but it remains reliable for repeated use. Crafting it from a single piece of wood gives it a satisfying sense of solidity.
Building A Primitive Cooking Skewer
Cooking skewers are among the quickest tools to carve, yet they prove incredibly useful. I usually select a straight, thin branch that can hold food securely without bending. The wood should be non-toxic and free from sap that could affect the taste of the food.
Sharpening one end into a fine point allows it to pierce meat, vegetables, or fish easily. I carve gradually, rotating the stick to maintain an even shape. A smooth surface helps prevent food from sticking or tearing during cooking. Small details like this improve both usability and results.
The opposite end can be left slightly thicker to act as a handle. This prevents heat from traveling too quickly to my hand and gives better control over the skewer. Even a simple tool like this can enhance the overall cooking experience in the wild.
Creating A Wooden Hook For Hanging Gear
A wooden hook helps organize gear and keep items off the ground. I often carve these from naturally curved branches, which provide a strong base shape. Using the natural curve reduces the amount of carving needed and increases durability.
I refine the hook by removing excess wood and smoothing the inner curve. This ensures that items can hang securely without slipping off. The thickness of the hook determines how much weight it can hold, so I avoid making it too thin. Strength is always a priority over appearance.
Adding a flat back or a notch allows the hook to attach to branches or structures more easily. This makes it versatile for different setups, whether in camp or while improvising storage solutions. A simple hook can make a big difference in keeping things organized.
Maintaining Tools And Preventing Cracks
Freshly carved tools need care to last longer. I try to let them dry slowly in a shaded area rather than exposing them to direct sunlight. Rapid drying can cause cracks, especially in thicker pieces. Patience during this stage helps preserve the integrity of the tool.
Occasionally, I smooth rough edges after the wood has partially dried. This improves comfort and reduces splinters during use. Maintenance doesn’t take much time, but it extends the life of each tool significantly. A little effort goes a long way in the wild.
If I have access to natural oils, I sometimes apply a light coating to protect the surface. This helps retain moisture balance and adds durability. Even without oil, proper drying and storage make a noticeable difference in how long the tools last.
Adapting Designs Based On Environment
Different environments call for different approaches to carving. In dense forests, I have access to a wide variety of wood types, allowing for more specialized tools. In drier areas, I rely on whatever is available, often working with tougher, more brittle wood.
Weather conditions also influence how I carve. Cold temperatures make wood harder and more resistant to cutting, while warm conditions keep it softer. Adjusting my technique based on these factors helps maintain efficiency and safety. Flexibility becomes essential when resources are limited.
Improvisation plays a key role in creating useful tools. I often adapt designs based on immediate needs rather than sticking to a fixed plan. This mindset allows me to make the most of available materials and respond to challenges as they arise.
The Value Of Practicing These Skills
Carving tools from wood builds confidence and self-reliance in ways that few other skills can. Each finished piece represents a solution created from raw materials using only basic tools and effort. The more I practice, the more efficient and precise my work becomes.
Mistakes are part of the process, and each one teaches something valuable. A cracked spoon or a broken peg isn’t a failure but a lesson in technique or material choice. Over time, these experiences add up, improving both skill and judgment.
Time spent carving also creates a deeper connection to the environment. Working with natural materials fosters respect for the resources being used and encourages thoughtful decision-making. It’s not just about making tools, but about engaging with the surroundings in a meaningful way.
Closing Thoughts On Wood Carving In The Wild
Turning raw wood into practical tools offers a sense of independence that is hard to match. Each tool carries the marks of the process, reflecting both effort and purpose. The simplicity of carving, combined with its usefulness, makes it an essential skill for anyone spending time outdoors.
With practice, patience, and attention to detail, even the most basic branch can become something valuable. The forest provides the materials, and the rest comes down to skill and creativity. Every carving session adds to that skill, making future tasks easier and more efficient.