When people think about survival, they often picture emergency food, water storage, or a backpack filled with gear. But one of the most valuable survival resources can be growing right outside your door.
A survival garden is more than a vegetable garden. It is a food-production system designed to provide reliable calories, nutrition, seeds, and fresh food over an extended period of time.
The key isn’t simply planting a lot of vegetables.
The key is knowing what to plant, when to plant it, and how to keep something growing throughout the year.

Start With the Crops That Matter
A survival garden should prioritize crops that produce substantial food, are relatively easy to grow, and can be stored or preserved.
Good choices include potatoes, sweet potatoes, corn, beans, peas, winter squash, pumpkins, tomatoes, carrots, beets, cabbage, onions, cucumbers, kale, and Swiss chard.
Don’t overlook herbs. Basil, oregano, parsley, sage, rosemary, and other herbs can provide flavor while requiring relatively little garden space.
For long-term food production, consider adding perennial crops such as asparagus, berries, fruit trees, and perennial herbs.
Build Your Garden Supply Kit
Before planting, assemble the basic equipment you’ll need. A good survival-garden setup should include hand tools, containers, water-storage equipment, gloves, pruning equipment, seed-storage supplies, and a way to move harvested food.
For additional preparedness gear, check out My Survival Outlet and Outlast Camp’s survival equipment. Outlast Camp currently carries water-storage equipment, camping equipment, cooking supplies, and other outdoor survival gear. (Outlast Camp)
Don’t Plant Everything at Once
One of the biggest mistakes new gardeners make is planting the entire garden on one weekend.
That can create a huge harvest—but then everything is ready at the same time.
Instead, use succession planting.
Plant a crop, wait a couple of weeks, and plant another section. This spreads the harvest over a longer period.
For example, instead of planting all your beans at once, divide them into three or four plantings.
This simple technique can turn a short harvest window into weeks of fresh food.
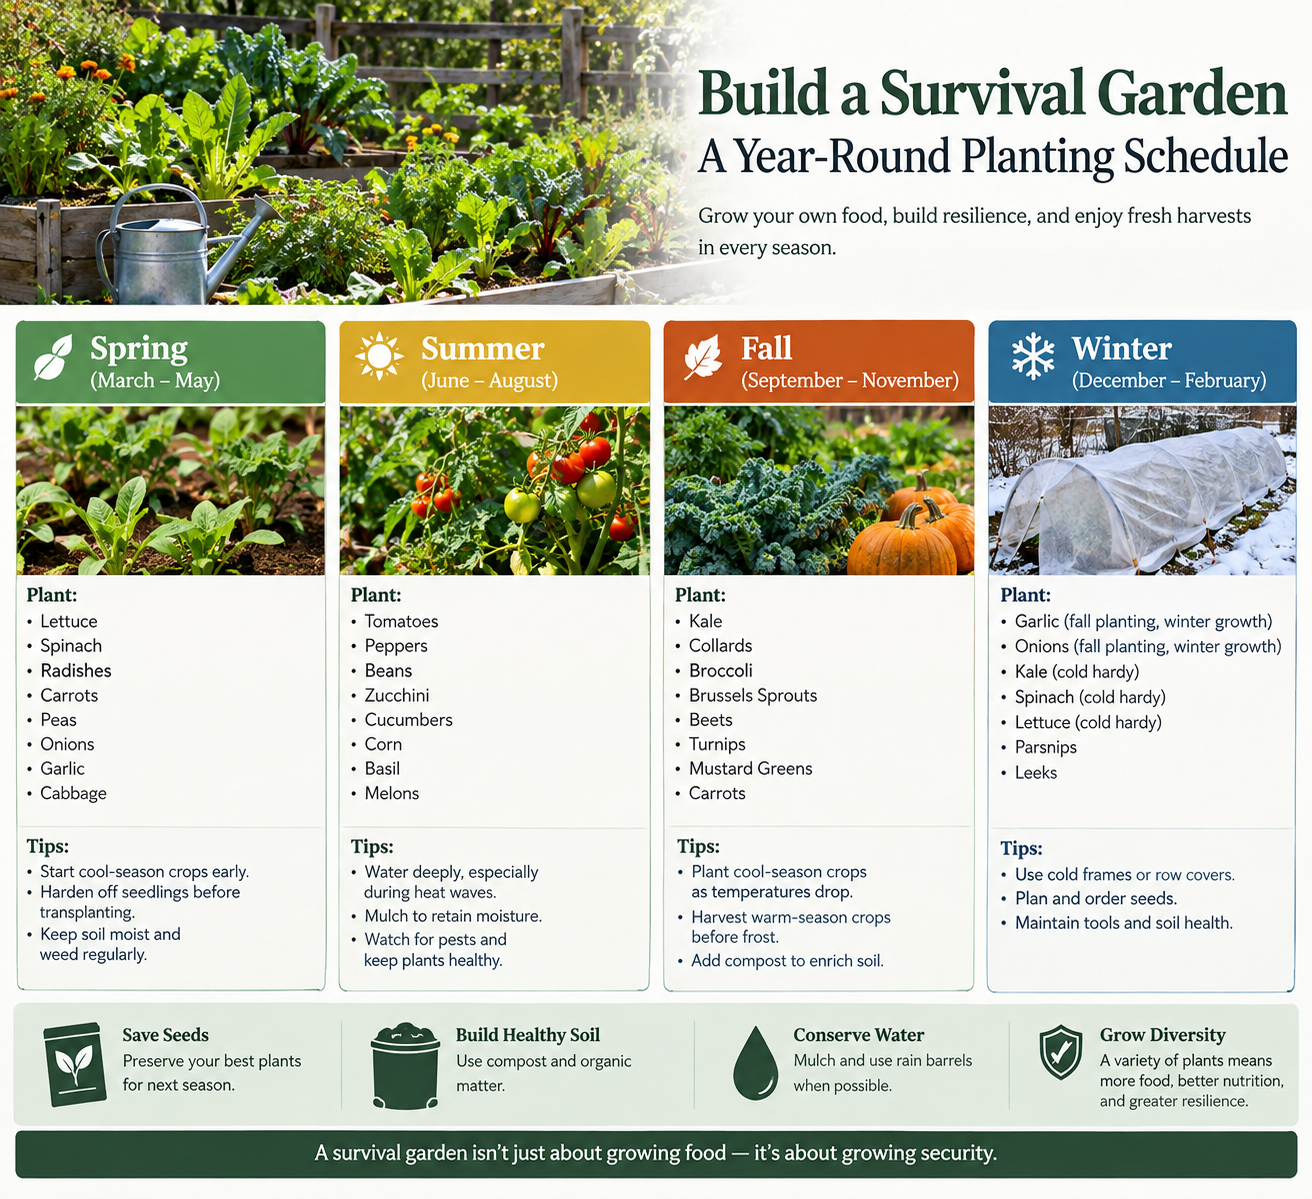
A Basic Survival Garden Schedule
Your exact planting dates depend on your USDA hardiness zone, frost dates, rainfall, and local growing conditions. Use the schedule below as a framework and adjust it to your location.
Late Winter: February–March
As winter begins giving way to spring, start planning.
Check your seed supply, test your soil, repair garden beds, and begin starting certain crops indoors.
Depending on your climate, this is a good time to begin:
Indoors:
- Tomatoes
- Peppers
- Broccoli
- Cabbage
- Kale
Outdoors where conditions permit:
- Peas
- Carrots
- Radishes
- Lettuce
- Spinach
- Onions
Fast-growing crops such as radishes and lettuce can be planted repeatedly every couple of weeks.
Spring: April–May
Once the danger of hard frost has passed, the garden can really take off.
Plant potatoes, beans, corn, cucumbers, tomatoes, squash, pumpkins, peppers, and melons.
This is also an excellent time to plant another round of carrots, beets, lettuce, and other cool-season crops if your climate allows.
Don’t forget your potatoes.
Potatoes are one of the most useful survival crops because they can produce substantial food from a relatively small area.
Summer: June–August
Summer doesn’t mean the planting season is over.
This is where succession planting becomes extremely valuable.
Plant additional beans, cucumbers, squash, corn, carrots, beets, and bush beans.
In hotter regions, summer can also be the time to transition toward heat-tolerant crops.
Keep harvesting continuously.
When beans, cucumbers, squash, and other plants are producing heavily, harvest them frequently. Regular harvesting can encourage many plants to continue producing.
Don’t Forget Water
A survival garden is only as dependable as its water supply.
Don’t rely completely on the garden hose or municipal water system. Consider building a backup water plan using rain collection, storage containers, irrigation systems, and other appropriate water sources.
For additional water-storage and outdoor hydration equipment, see Outlast Camp’s Water & Hydration collection. The collection currently includes large-capacity water-storage equipment. (Outlast Camp)
For emergency preparedness equipment, Outlast Camp’s Survival Equipment collection also includes water-storage and hydration products. (Outlast Camp)
Preserve the Harvest
Summer is also the time to begin thinking about preservation.
Don’t wait until you have more food than you can handle.
Learn to:
- Can
- Dehydrate
- Freeze
- Ferment
- Store root vegetables
- Save seeds
Your survival garden isn’t just producing food for today.
It should help produce food for the months ahead.
When you’re processing food outdoors or away from your kitchen, Outlast Camp’s cooking supplies can also be useful for outdoor cooking and food preparation. The current collection includes portable cookware and camping cooking sets. (Outlast Camp)
Fall: August–October
Fall can be one of the most productive seasons in a survival garden.
As temperatures begin to moderate, plant another round of cool-season crops.
Depending on your climate, consider:
- Lettuce
- Spinach
- Kale
- Radishes
- Carrots
- Beets
- Turnips
- Peas
- Broccoli
- Cabbage
Garlic is commonly planted in the fall for a harvest the following year.
This is also the time to harvest many storage crops.
Bring in pumpkins, winter squash, onions, sweet potatoes, and other crops that can be stored for later use.
Winter: November–January
Winter doesn’t necessarily mean the garden stops producing.
In mild climates, cold-hardy crops such as kale, spinach, carrots, cabbage, and certain herbs may continue producing.
In colder areas, use the winter to protect the soil and prepare for the next growing season.
Cover crops, mulch, compost, and other soil-building techniques can help keep your garden productive year after year.
Winter is also the perfect time to review your garden.
Ask yourself:
What grew well?
What failed?
What produced the most food?
What required too much work?
What should you plant more of next year?
Keep a garden journal.
Over several years, that notebook can become one of your most valuable survival resources.
Build the Garden Around Food Security
A survival garden shouldn’t depend on a single crop.
If your entire garden is tomatoes and the tomatoes fail, you’ve got a problem.
Instead, create several layers of food production.
Fast crops provide food quickly.
Radishes, lettuce, spinach, and other greens can produce relatively quickly.
Staple crops provide larger amounts of food.
Potatoes, sweet potatoes, corn, beans, and winter squash can form the backbone of the garden.
Storage crops extend your harvest.
Onions, potatoes, sweet potatoes, carrots, pumpkins, and winter squash can potentially provide food long after they’re harvested when properly stored.
Perennial crops reduce future work.
Fruit trees, berries, asparagus, and perennial herbs can continue producing without being replanted every season.
Together, these layers create something much more useful than a traditional backyard vegetable garden.
They create a food system.
Save Seeds
A true survival garden should eventually become less dependent on the store.
That means learning to save seeds from appropriate open-pollinated crops.
Choose healthy plants and save seeds from desirable specimens. Label everything with the crop, variety, and year.
Store seeds in a cool, dry, dark environment and periodically test older seeds for germination.
Your goal isn’t simply to have a garden this year.
Your goal is to be able to plant one next year—and the year after that.
Build a Complete Preparedness System
A garden is only one part of preparedness.
Food production should work alongside water storage, cooking equipment, shelter, tools, lighting, and emergency supplies.
For example, Outlast Camp’s Survival Kits collection offers emergency and outdoor survival equipment that can complement a larger preparedness system. (Outlast Camp)
The goal isn’t to buy everything at once.
Build your system gradually.
Grow food. Store water. Learn preservation. Build skills. Add equipment.
Each capability makes the overall system stronger.
The Survival Garden Mindset
The biggest advantage of a survival garden isn’t the vegetables sitting in the soil.
It’s the knowledge.
You learn your soil.
You learn your climate.
You learn which crops survive heat, drought, insects, heavy rain, and neglect.
You learn how much food a certain amount of space can actually produce.
And you learn how to turn a handful of seeds into food.
Start small if necessary.
A few raised beds are better than an enormous garden you can’t maintain. Once you understand what works, expand.
A successful survival garden doesn’t happen overnight.
Plant. Harvest. Preserve. Save seeds. Replant. Improve.
Do that year after year, and your garden becomes more than a source of fresh vegetables.
It becomes another layer of preparedness.
Because when the shelves are empty, knowing how to grow food can be more valuable than knowing where to buy it.
Survival Boys Quick Planning Guide
Late Winter: Plan, prepare soil, start seedlings.
Spring: Plant potatoes, beans, corn, tomatoes, squash and other warm-season crops.
Summer: Succession plant and preserve surplus food.
Fall: Plant cool-season crops and harvest storage vegetables.
Winter: Protect the garden, save seeds, improve soil and plan next year’s crops.
Every Season: Record what worked and what didn’t.
Build Your Survival Garden
Garden & Survival Supplies:
MySurvivalOutlet.com
Outdoor Survival Equipment:
Outlast Camp – Survival Equipment
Water Storage & Hydration:
Outlast Camp – Water & Hydration
Outdoor Cooking & Food Preparation:
Outlast Camp – Cooking Supplies
Emergency Survival Kits:
Outlast Camp – Survival Kits